Phasmophobia has 21 pieces of equipment, and each one exists in three tiers. A tier is unlocked once: you reach its level and pay its unlock cost in the shop. After that you buy the item per piece as before, at the same price for every tier. This page compares the tiers. Prices and sell values are on the Money page, and the list of what each level unlocks is on Experience and Levels.
The starter kit
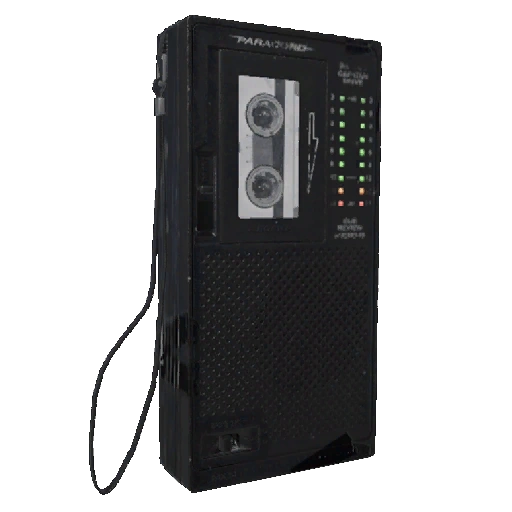
Eight items are yours from level 1, and together they cover all seven types of evidence:
| Item | Evidence it finds |
|---|---|
| D.O.T.S. Projector | D.O.T.S. Projector |
| EMF Reader | EMF Level 5 |
| Ghost Writing Book | Ghost Writing |
| Spirit Box | Spirit Box |
| Thermometer | Freezing Temperatures |
| UV Light | Ultraviolet |
| Video Camera | Ghost Orbs |
| Flashlight | None. It is your light. |
The other thirteen items unlock their Tier I by level alone, with no unlock cost: Photo Camera at level 2, Motion Sensor at 3, Sound Recorder at 4, Parabolic Microphone at 5, Crucifix at 7, Salt at 8, Tripod at 9, Sound Sensor at 10, Firelight and Igniter at 12, Head Gear at 13, and Incense and Sanity Medication at 14.
What each tier changes
| Item | Tier I | Tier II | Tier III |
|---|---|---|---|
| Crucifix | 3 m range, stops 1 hunt | 4 m, stops 2 hunts | 5 m, stops 2 hunts, or 1 cursed hunt with both charges |
| D.O.T.S. Projector | Narrow spotlight, 5 m | Area light, 2.5 m | Wide spotlight that scans the room, 7 m |
| EMF Reader | 1.7 m range | 2 m, adds a sound | 3.5 m, adds a screen with distance and direction |
| Firelight | Burns 5 minutes, cuts sanity drain by 33% | 10 minutes, 50% | Never burns down, waterproof, 66% |
| Flashlight | Weak, narrow beam | Medium, narrow beam | Strong, wide beam |
| Ghost Writing Book | 3 m range, lowest writing rate | 4 m, medium rate | 5 m, highest rate |
| Head Gear | Head camera | Head lamp that needs no hand | Night vision goggles |
| Igniter | Matches: 10 uses of 10 seconds | Lighter, burns 5 minutes | Lighter, burns 10 minutes, waterproof |
| Incense | 3 m range, blinds the ghost for 5 seconds in a hunt | 4 m, also slows the ghost for 5 seconds | 5 m, stops the ghost for 5 seconds |
| Motion Sensor | Line across a doorway, light signal | Line or narrow cone, adds a sound | Scans a full circle of 1.5 m |
| Parabolic Microphone | 20 m range | 30 m, adds a screen | 30 m, shows distance and direction |
| Photo Camera | 3 seconds between photos | 2 seconds, adds a screen | 1 second, least disturbed by the ghost |
| Salt | 2 piles | 3 piles | 3 piles, slows the ghost for 2 seconds in a hunt |
| Sanity Medication | Restores sanity over 20 seconds | Over 10 seconds | Over 10 seconds, plus 10 seconds of sprinting without getting tired |
| Sound Recorder | 3 m range | 5 m, adds a screen | 5 m, shows distance and direction |
| Sound Sensor | Ranges of 5 or 10 m | 5, 10 or 15 m | 5, 10 or 15 m, with a choice of shapes |
| Spirit Box | 3 m range, lowest response rate | 4 m, medium rate, adds a screen | 5 m, highest rate and clearest sound |
| Thermometer | Slow and imprecise | Faster and more precise | Fastest and most precise |
| Tripod | Easy for the ghost to knock over | Steadier, camera can be turned from the truck | Steadiest, camera can be turned from the truck |
| UV Light | Narrow flashlight, prints take 5 seconds to charge | Glowstick: lights an area for 60 seconds, 10 seconds to charge | Wide flashlight, 1.5 seconds to charge |
| Video Camera | Lowest image quality, most interference | Medium | Best image, least interference |
A higher tier is not always the better tool for the job. The Tier II D.O.T.S. Projector lights only 2.5 m, half the reach of Tier I, and the Tier II UV Light charges prints more slowly than Tier I. Both trade reach for covering an area without being held.
Unlock levels and costs




Unlock level 0 marks the eight starter items.
All 42 upgrades together cost $186,750. The cheapest are the Igniter ($500 for Tier II, $750 for Tier III), the Tier III Sound Sensor ($1,500), and the Tier III UV Light and Tier II Sanity Medication ($2,000 each). The most expensive wait at level 80: the Tier III Crucifix for $20,000 and the Tier III Incense for $15,000. Head Gear costs $10,000 for each of its two upgrades, and so does the Tier III Firelight.
The first Tier II items come at level 18 (EMF Reader, Flashlight and UV Light). The last Tier III items come at level 80 (Crucifix, Head Gear and Incense). A prestige takes away every item and every upgrade, and you unlock them by level again.
What to upgrade first
Money is short in the level 18 to 50 range, when a new upgrade unlocks every few levels at about $3,000 each. The numbers suggest this order:
- The tools that keep you alive. Tier II Incense (level 37, $3,500) reaches a metre further and slows the ghost. The Tier II Crucifix (level 34, $4,000) stops two hunts, not one. Tier II Sanity Medication (level 39, $2,000) works in half the time.
- Evidence tools whose odds improve. The Spirit Box and the Ghost Writing Book answer more often and from further away with each tier, which saves the most time when a ghost is slow to respond. The Tier III EMF Reader doubles its range and points at the source.
- The cheap ones as they come. Both Igniter upgrades, the Tier III Sound Sensor and the Tier III UV Light cost $2,000 or less.
- The comfort upgrades last. Head Gear, the Tier III Firelight and the two level 80 upgrades cost $10,000 to $20,000 each and change less of an ordinary contract. The exception is a team that plays with cursed possessions a lot: only a Tier III Crucifix can stop a cursed hunt.
How many you can bring
Each player's limit per contract is 2 for the Crucifix, D.O.T.S. Projector, EMF Reader, Ghost Writing Book, Parabolic Microphone, Sound Recorder, Spirit Box, Thermometer and UV Light, 3 for the Photo Camera and Salt, and 4 for everything else.
Electronic or not
The game treats some equipment as electronic. That matters in three ways: a switched-on electronic item in your hand draws the ghost to you in a hunt from 7.5 m, electronic items malfunction near the ghost, and a Raiju gets faster near them. The Surviving a Hunt page has the details.
Electronic in every tier: D.O.T.S. Projector, EMF Reader, Flashlight, Head Gear, Motion Sensor, Parabolic Microphone, Sound Recorder, Sound Sensor, Spirit Box and Video Camera. Three items change with the tier: the Photo Camera and the Thermometer are electronic only from Tier II, and the UV Light is electronic in Tier I and III but not as the Tier II glowstick.
| Equipment | Tier | Features |
|---|---|---|
 Crucifix Tier I | 1 | Range (m): 3; Uses: 1; Placeable |
| Crucifix Tier II | 2 | Range (m): 4; Uses: 2; Placeable |
| Crucifix Tier III | 3 | Range (m): 5; Uses: 2; Prevents one Cursed Hunt; Placeable |
 Firelight Tier I | 1 | Range (m): 2; Duration (min): 5; Sanity drain reduction (%): 33; Placeable |
 Firelight Tier II | 2 | Range (m): 2; Duration (min): 10; Sanity drain reduction (%): 50; Placeable |
 Firelight Tier III | 3 | Range (m): 2; Sanity drain reduction (%): 66; Waterproof; Placeable |
 Ghost Writing Book Tier I | 1 | Interaction rate: 1/3; Range (m): 3 |
| Ghost Writing Book Tier II | 2 | Interaction rate: 2/3; Range (m): 4 |
| Ghost Writing Book Tier III | 3 | Interaction rate: 3/3; Range (m): 5 |
 Igniter Tier I | 1 | Duration (s): 10; Uses: 10 |
 Igniter Tier II | 2 | Duration (min): 5 |
 Igniter Tier III | 3 | Duration (min): 10; Waterproof |
 Incense Tier I | 1 | Range (m): 3; Duration (s): 5; Blinds ghost during hunt (s): 5 |
| Incense Tier II | 2 | Range (m): 4; Duration (s): 6; Blinds ghost during hunt (s): 5; Slows ghost during hunts (s): 5 |
| Incense Tier III | 3 | Range (m): 5; Duration (s): 7; Blinds ghost during hunt (s): 5; Halts ghost during hunts (s): 5 |
 Photo Camera Tier I | 1 | Time between photos: 3 |
 Salt Tier I | 1 | Uses: 2 |
| Salt Tier II | 2 | Uses: 3 |
| Salt Tier III | 3 | Uses: 3; Slows ghost during hunts (s): 2 |
 Sanity Medication Tier I | 1 | Sanity restoration speed (s): 20 |
| Sanity Medication Tier II | 2 | Sanity restoration speed (s): 10 |
| Sanity Medication Tier III | 3 | Sanity restoration speed (s): 10; Sprint boost (s): 10 |
 Thermometer Tier I | 1 | Accuracy: 1/3; Sample speed: 1/3 |
 Tripod Tier I | 1 | Stability: 1/3; Placeable |
| Tripod Tier II | 2 | Stability: 2/3; Placeable; Rotation control |
| Tripod Tier III | 3 | Stability: 3/3; Placeable; Rotation control |
 UV Light Tier II | 2 | Duration (s): 60; UV charge time: 10; Area light |
Sources: Phasmophobia Wiki on Fandom (Equipment and the 21 item pages). Unofficial fan content, not affiliated with Kinetic Games.